Planting rhythm beneath the foliage
Tropical gardens grow with such generosity that straight lines feel almost rebellious. That tension is the pleasure: a grid or spiral half-veiled by leaves, waiting for the right step to bring it into focus.

Why geometry belongs in a lush garden
Geometric planting is older than any of us. The Renaissance-style parterres at the Château de Villandry in the Loire Valley use clipped box and vegetables to draw crosses, hearts and grids that are best seen from the terraces above. In the tropics, the Brazilian landscape architect Roberto Burle Marx translated that ambition into flowing masses of single species, painting with bromeliads, philodendrons and grasses at the Sítio Roberto Burle Marx near Rio de Janeiro and in the famous wave paving of the Copacabana promenade.
What both traditions share is a sense of order you discover rather than receive. In a home garden, the goal is not a formal showpiece but a quiet rhythm: five clumps of mondo grass that repeat at the same interval, a ring of rosettes around a mango tree, a checkerboard of croton and fern visible only once you reach the bench.
Grids, spirals and repeating blocks
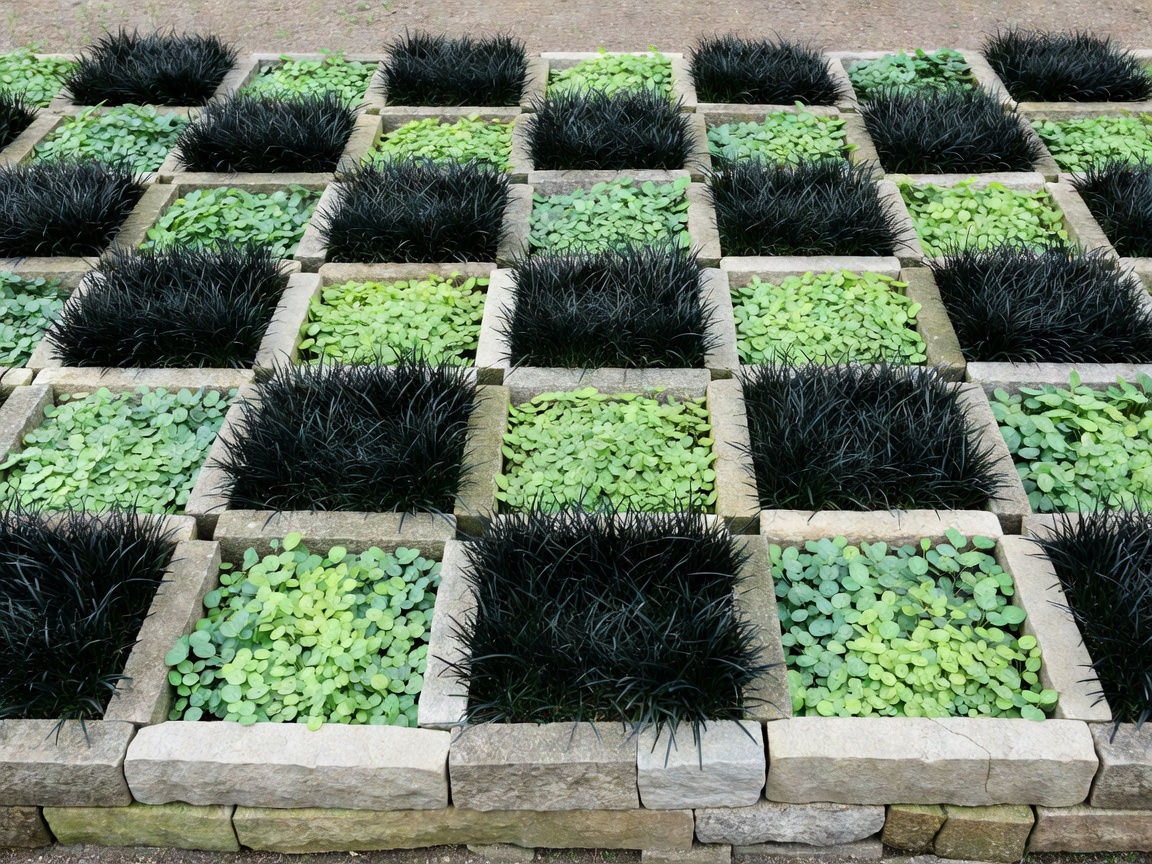
Grids and checkers are the easiest to keep legible. Alternate two plants of similar height but contrasting tone, such as dark mondo grass and lime-green Pilea, or burgundy Iresine and silver Plectranthus. Equal heights matter more than colour: if one square towers, the eye reads a hedge, not a pattern.
Spirals echo the rosettes of pineapples, agaves and bromeliads themselves, which arrange their leaves in Fibonacci-related spirals. A planted spiral works beautifully around a single feature tree. Start with an odd number of turns so the line appears to keep moving.
Repeating blocks are subtler. Plant the same trio of heliconia, cordyline and ginger at regular intervals along a path. Few visitors will name the pattern, but most will feel that the walk has a beat.
Density: how close is close enough
The temptation in a new pattern bed is to plant tightly for instant crispness. In warm, wet climates this backfires within months, as plants crowd, lean and blur the boundary. Space each plant for its mature spread, then fill the early gaps with mulch, gravel in the pattern colour, or short-lived annuals you will remove later.
Prefer clumping species over runners. Spreading groundcovers that root along their stems will cross a line overnight, and some, such as Sphagneticola trilobata, are listed as invasive in parts of the tropics. Consult your regional invasive plant list before choosing any vigorous filler.
A pattern does not fail in one dramatic storm. It fails one runner at a time, between visits.
Viewing angle: where the pattern resolves
A geometric bed viewed from standing height is foreshortened; a circle reads as a flattened oval and squares near the back look like strips. Burle Marx designed many schemes to be seen from above, from roof terraces and city towers. At home, you can borrow this effect with a raised deck, a few steps, or a window above the garden.
Even 30 to 60 cm of extra height makes a remarkable difference. If you cannot raise the viewer, stretch the pattern lengthwise along the line of sight, a technique known as anamorphic correction, so it appears regular from your chosen spot.
Walk the site at different times of day too. Low morning light rakes across foliage and emphasises texture, while midday sun flattens it. A pattern based on leaf sheen, such as glossy philodendron against matt ferns, may be strongest in the early hours.
A seasonal rhythm for pattern beds
Maintenance is the medium of geometric planting. Ten minutes with shears every few weeks preserves more than a full day of rescue work twice a year. Photograph the bed from the reveal point at each change of season; comparing images shows exactly where lines are softening.
- Edge borders every 3–4 weeks
- Pull seedlings before they root
- Trim Alternanthera ribbons
- Water blocks evenly with drip lines
- Top up mulch in pattern colours
- Divide crowded clumps
- Photograph from the reveal point
- Replace failing plants in whole blocks
- Check that stepping stones sit flush
When a plant fails, replace the entire block rather than a single specimen. Mixed ages within one square grow unevenly and the eye notices immediately. Keep a few spares in pots at the side of the garden for exactly this purpose.